Step by Step Instruction how to install and configure TLP Portfolio PRO for WordPress
1. Download & Install
2. Activation
3. Settings
4) Add Category
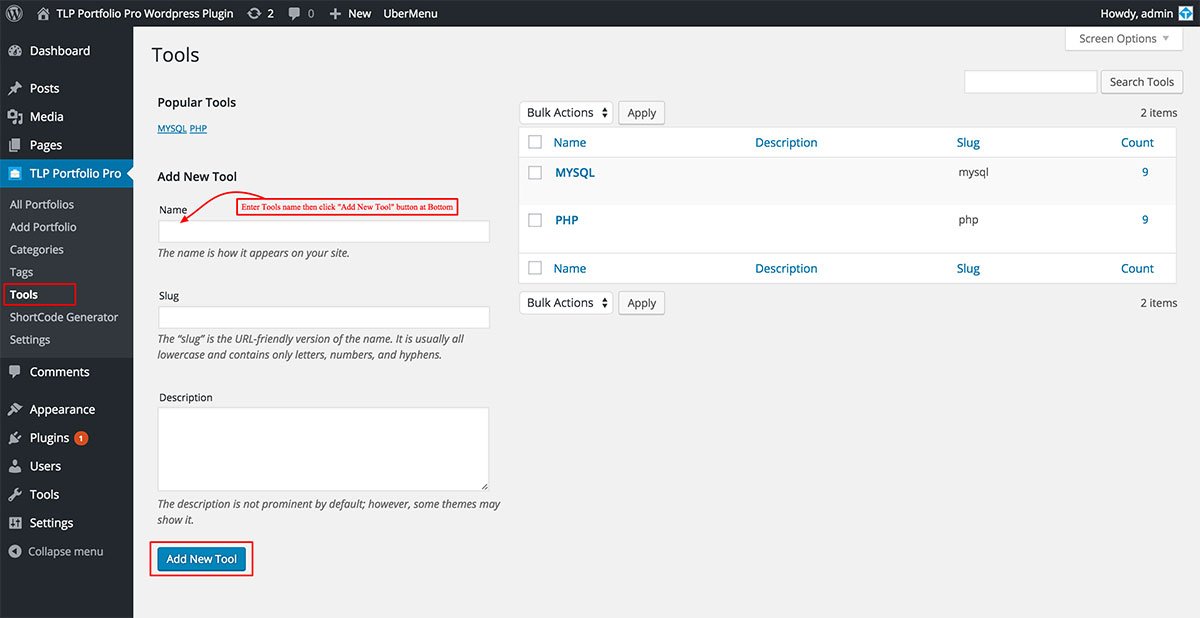
5) Add Tools
6) Add Tags
7) Add Portfolio Item
8.1) ShortCode Generator
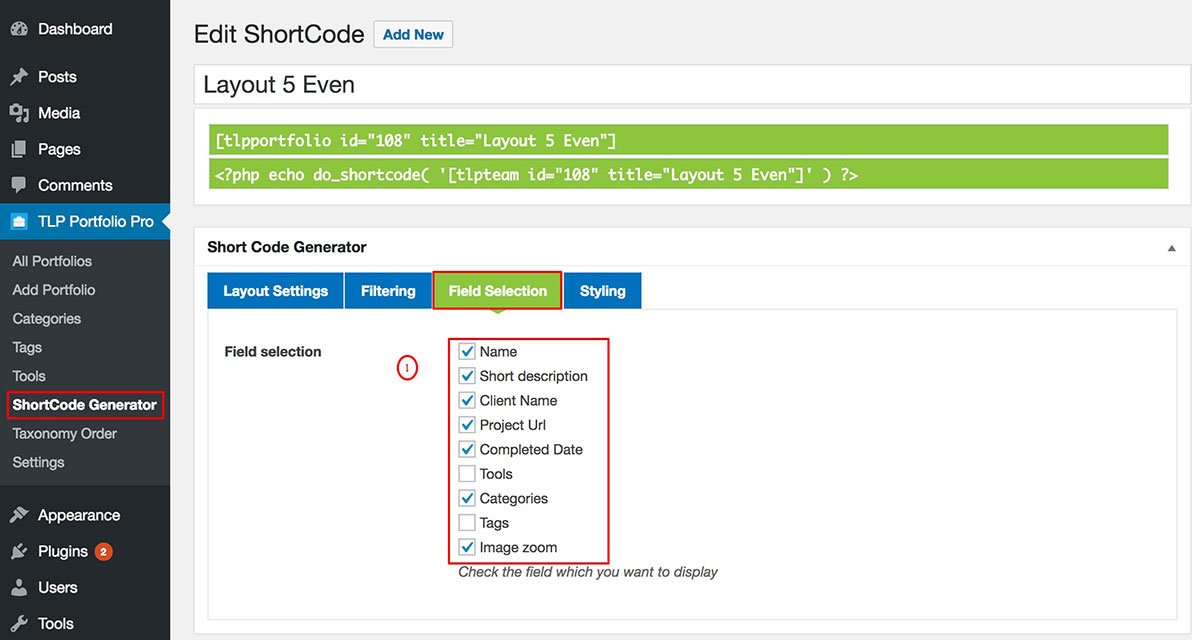
8.2) ShortCode Field Selection
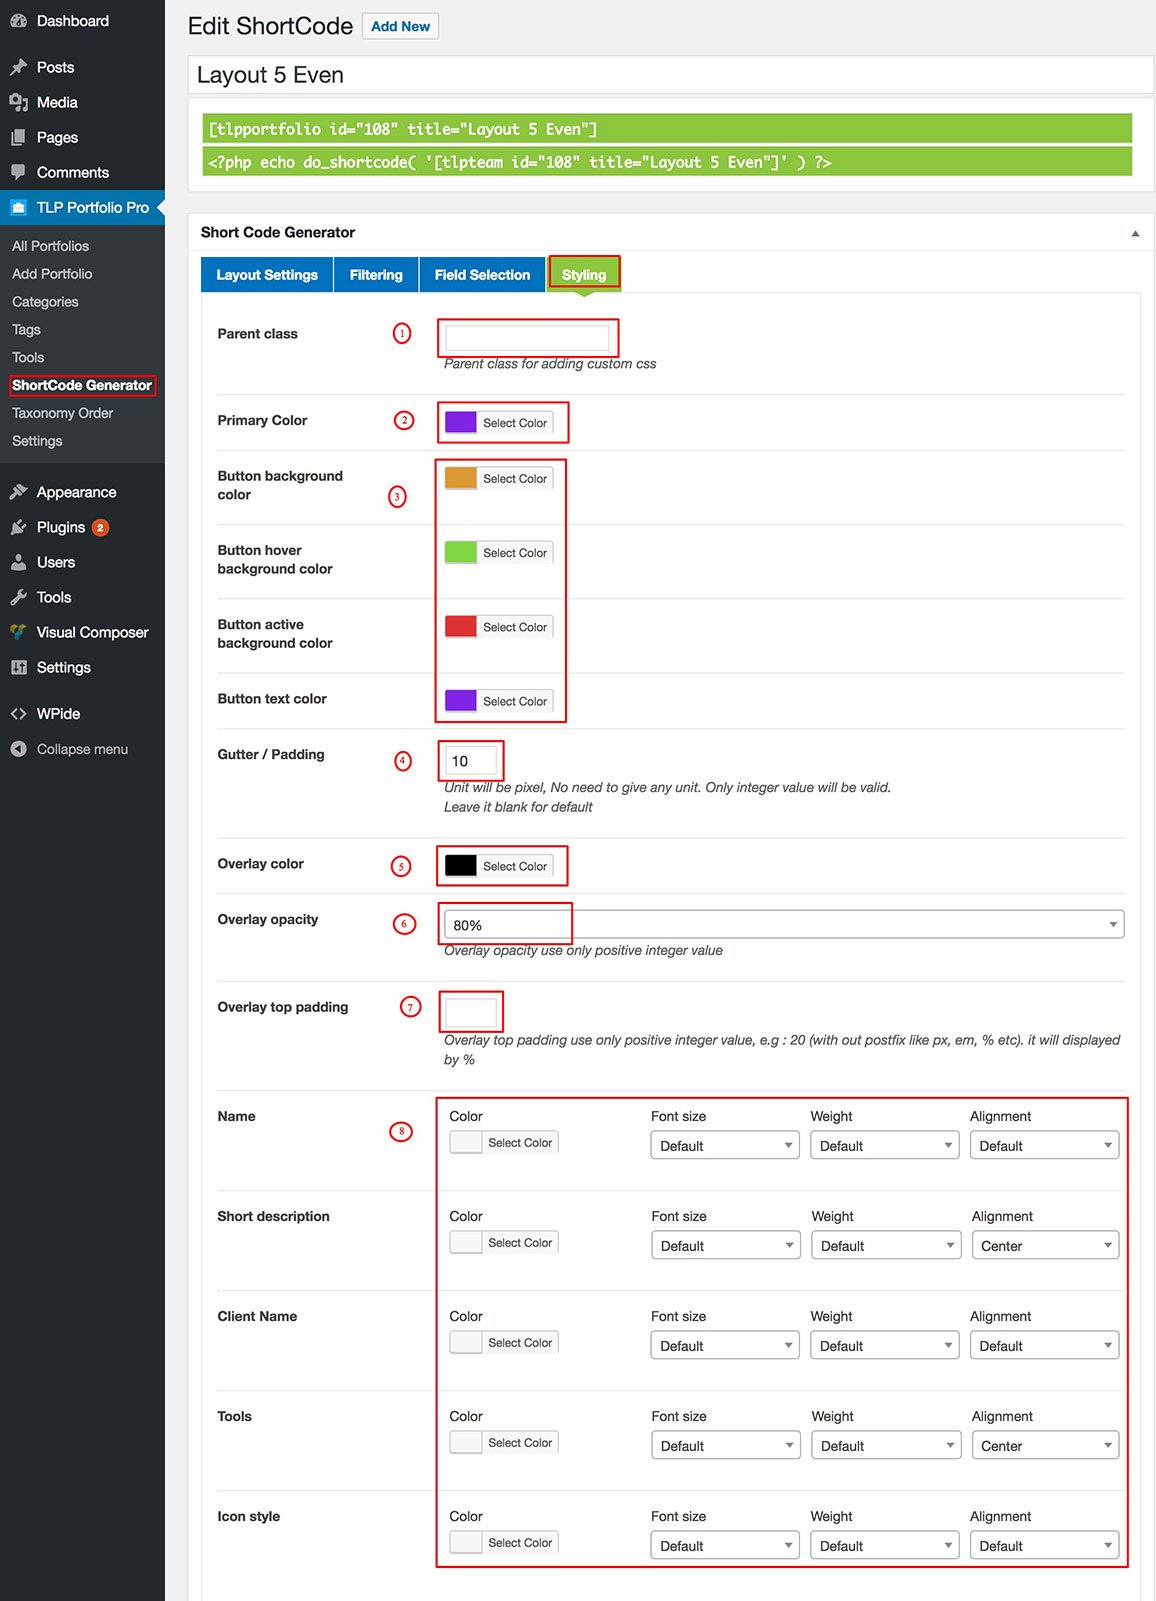
8.3) ShortCode Styling
9) Carousel Slider
10) Specific Portfolio Item(s)
11) Add into Page/ Post
12) Active License
Step 1: First download the TLP Portfolio Pro from you purchase email download link or login from top menu then go to purchase history.

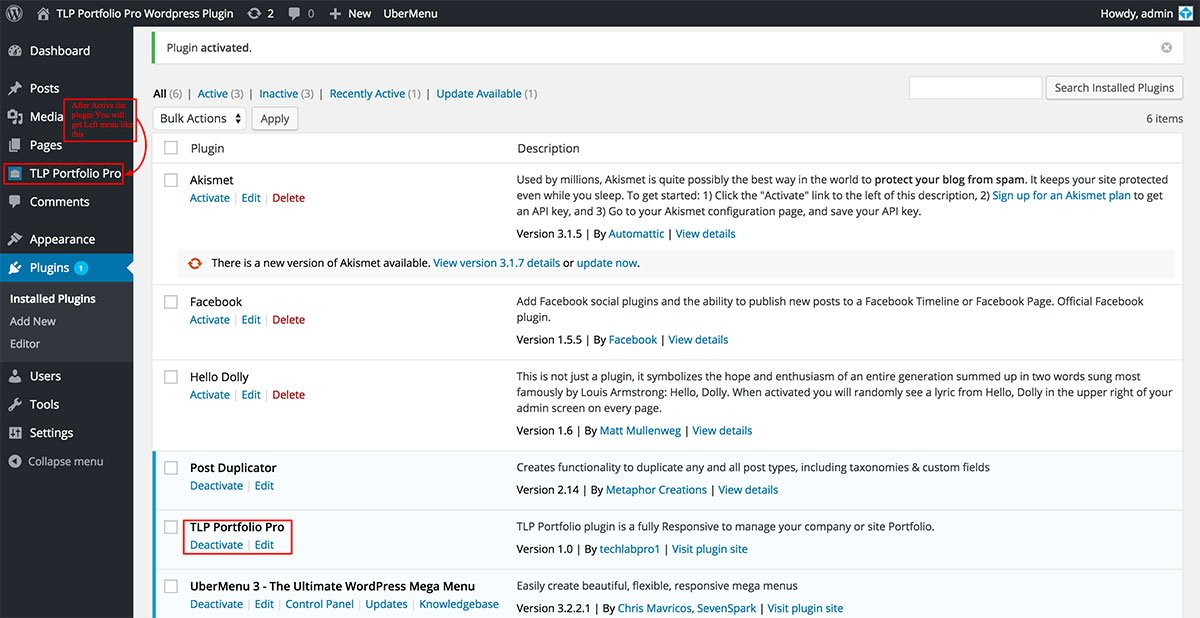
Step 2: After Installation Active the Plugin then you will get Left Sidebar menu for TLP Portfolio PRO
Step 3: Now Go to Settings Menu to setup general configuration.

Here is Settings of General Tab
3.1) Slug:
By default slug is portfolio if you want you can change it. Slug use for permalink.

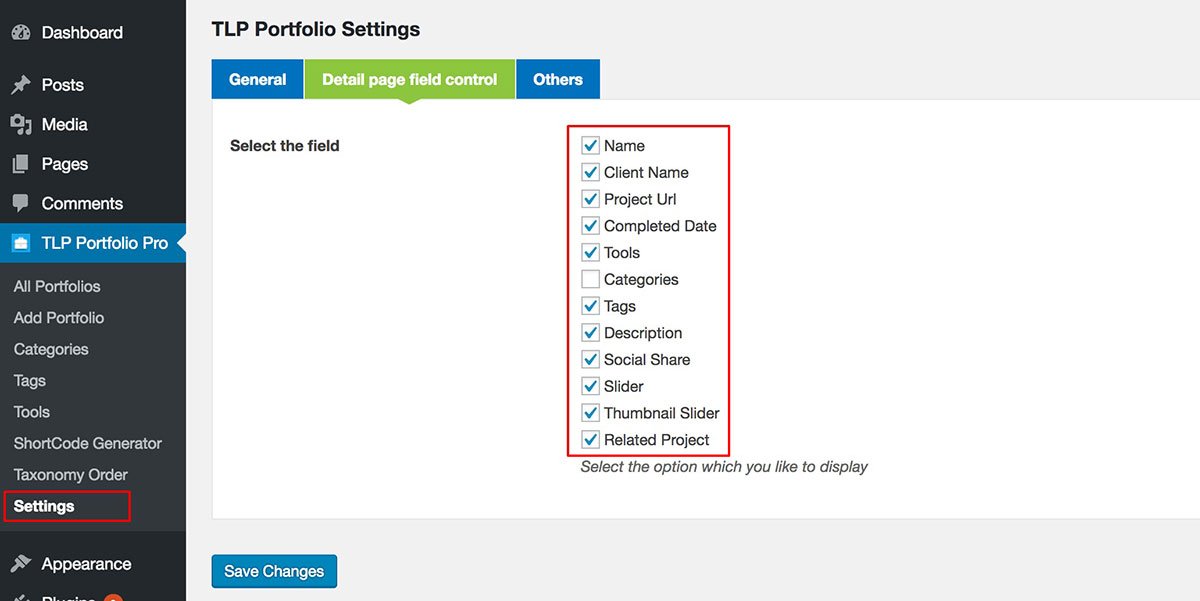
3.2) Settings Detail page field control:
You can show/ hide detail or popup page fields from here.
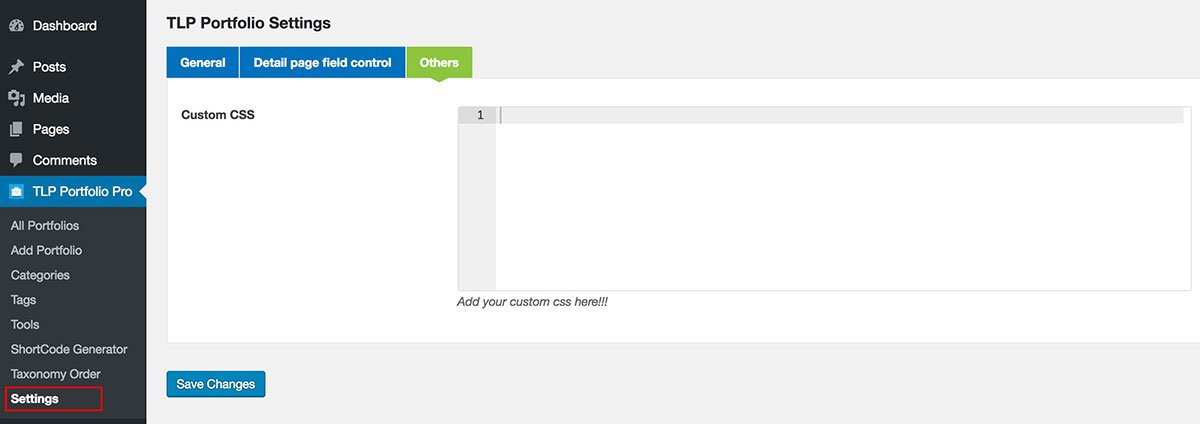
3.3) Others.
You can write Custom Css here

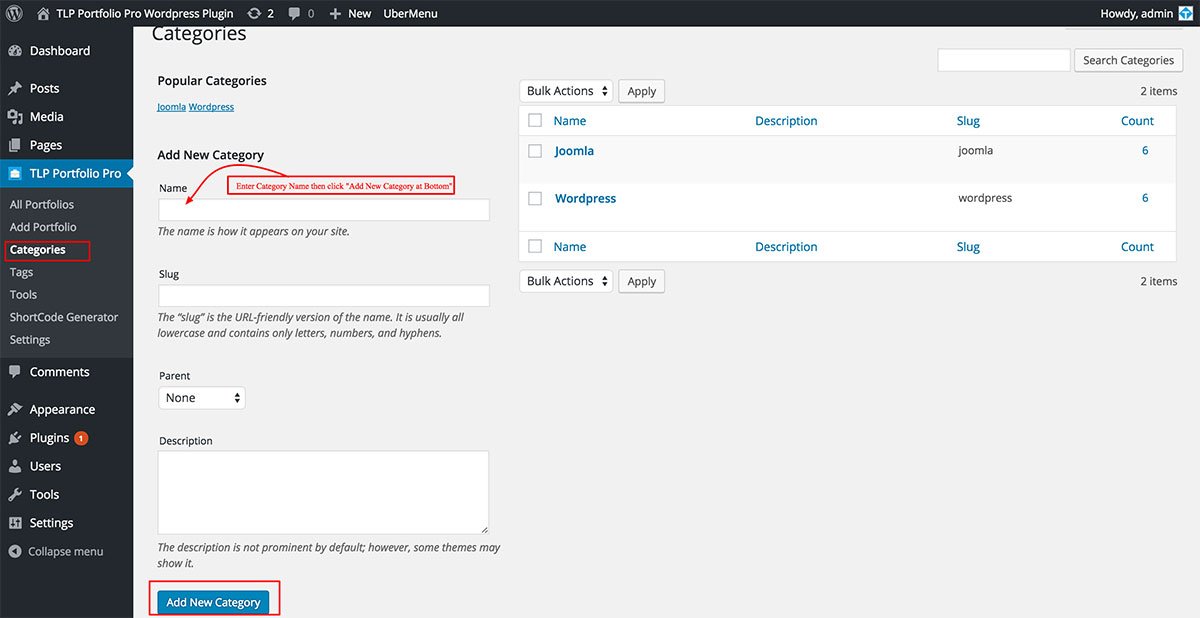
Step 4: Add Category
Step 5: Add Tools
Step 6: Add Tags
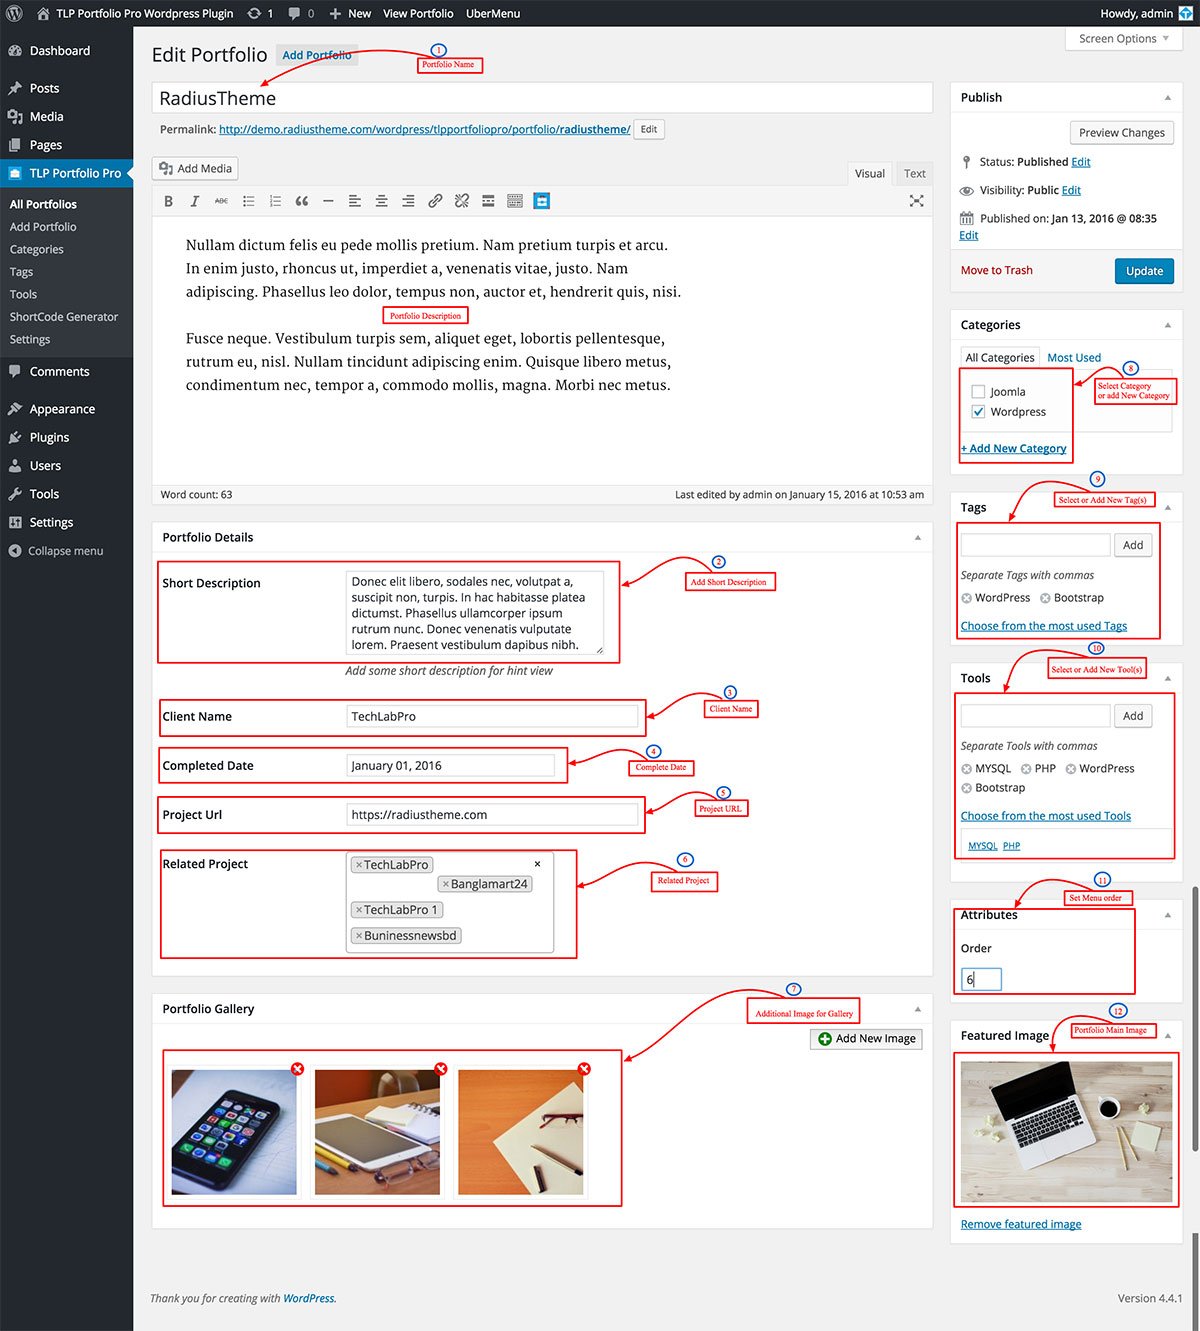
Step 7: Add Portfolio Item

7.1) Title field: Add Portfolio title here
7.2) Short Description: Add Short Description here you can control its limit from ShortCode Generator.
7.3) Client Name: You can add Client name or keep empty.
7.4) Completed Date: You can add date or keep empty.
7.5) Project url: You can add Live url here.
7.6) Related Project: Add related project here or keep empty.
7.7) Gallery Image: Add additional image here for detail/ popup page gallery.
7.8) Category: Add New Category or select from existing category.
7.9) Tags: Add New Tag or select from existing Tags
7.10) Tools: Add New Tools pr select from existing Tools
7.11) Order: You can order from here or in list view drag & drop also.
7.12) Image: This is the main portfolio image it will show in list view page and first of gallery image.
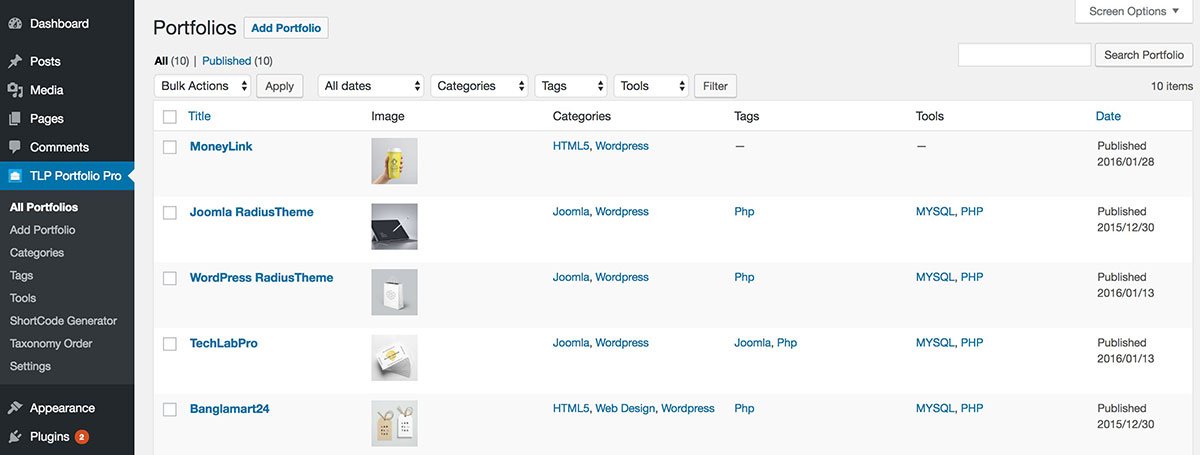
List View admin end
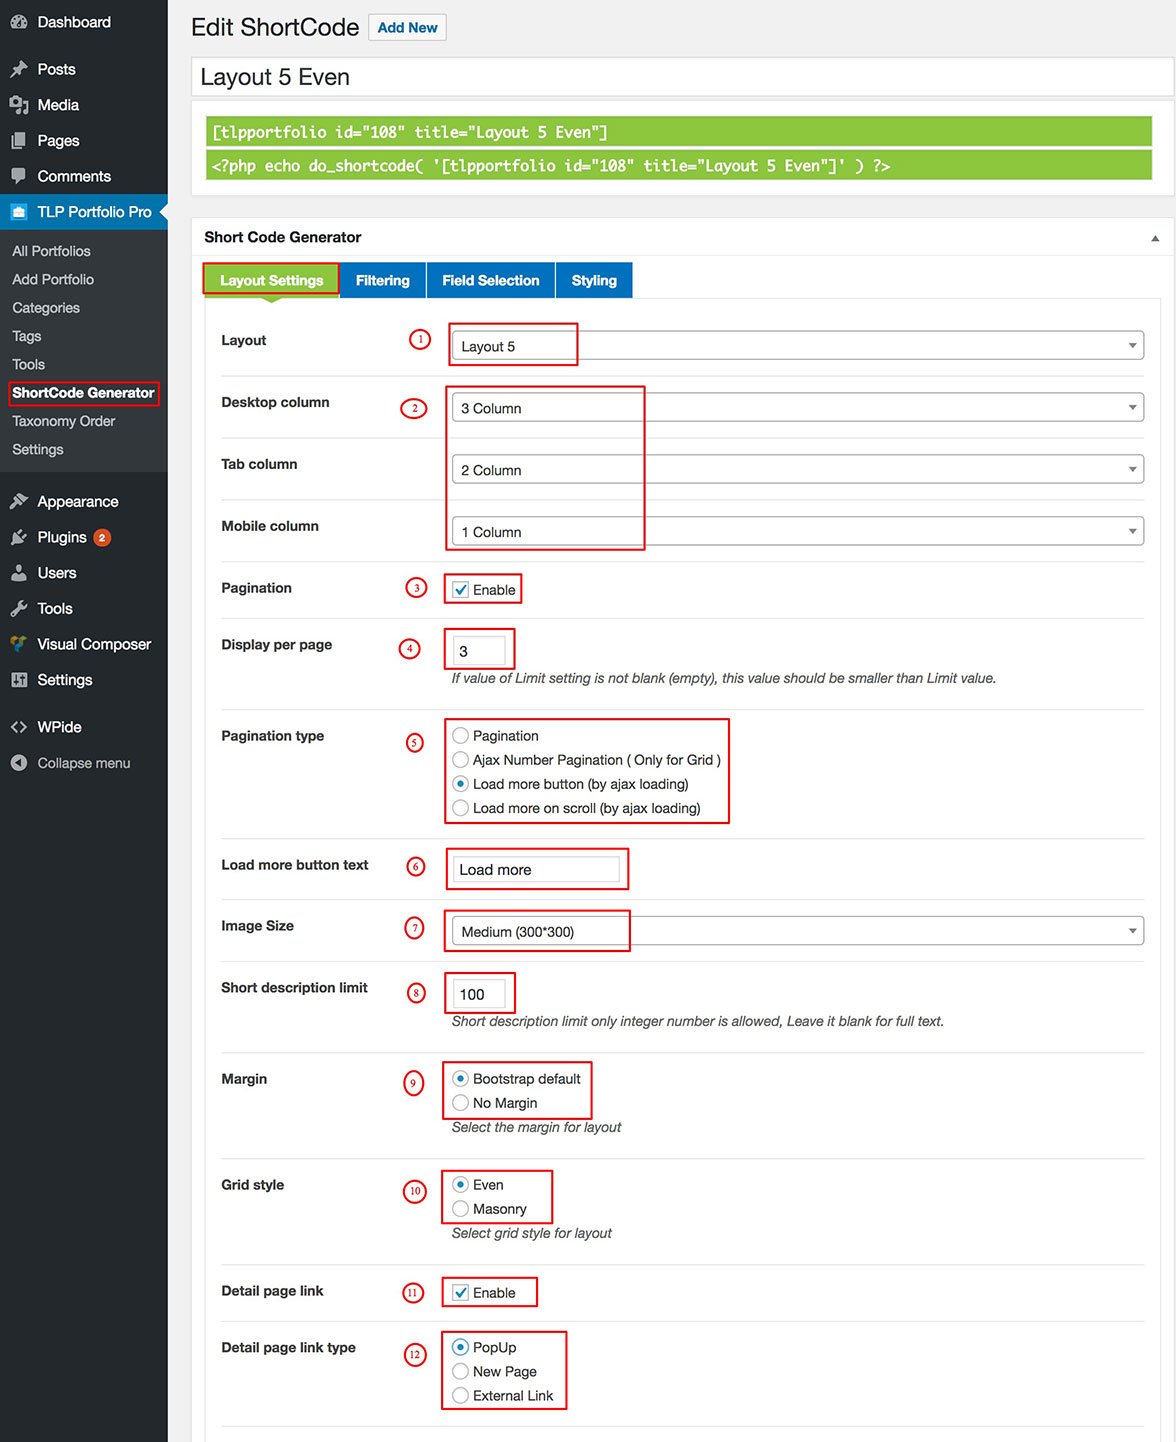
Step 8: Now go to ShortCode Generator to use the portfolios
8.1) General Settings
First enter a name of your ShortCode
8.1.1) Layout: Select the layout which one you like total 15 layouts included.
8.1.2) Display Control: You can set how many display per row in Desktop, Tab and Mobile devices.
8.1.3) Pagination: Check if want to enable Pagination.
8.1.4) Display Per Page: You can set how many show per page.
8.1.5) Pagination Type: From 4 types of pagination you can select which one you like. For Load More you can change text also.
8.1.6) Load more Button Text: You can change your own text here.
8.1.7) Image Size: From dropdown you can select the image size or can set custom image size.
8.1.8) Short Description Limit: You can set Short Description limit how many character will show.
8.1.9) Margin: Select Bootstrap Default Margin(30 px) or no Margin
8.1.10) Grid Type: Even or Masonry
8.1.11) Detail Page Link: You can enable detail page link
8.1.12) Detail Page Link Type: You can set link type popup with next preview, Normal link or External link
8.2.1) Include Only: You can set ID by comma like 1,2,3
8.2.2) Exclude: If you want to exclude specific item then add that id here.
8.2.3) Limit: You can set how many want to display.
8.2.4) Categories: You can set categories here or keep blank for all categories.
8.2.5) Tags: You can set Tags here or keep blank for all Tags.
8.2.6) Tools: You can set Tools here or keep blank for all.
8.2.7) Taxonomy Relation: You can relation here.
8.2.8) Order By: Name, Id, Date & Random.
8.2.9) Order: Asending or Descending

8.3) Field Selection
You can select which field(s) will show in List view page
8.4.1) Parent Class: You can set your own class for the grid view
8.1.2) Select Primary color it is the based color of the theme or logo.
8.1.3) Button Color: You can set button background color, background hover color,background active color and button text color
8.1.4) Gutter/ Padding: You can set Gutter ie padding of each item.
8.1.5) Overlay color: You can set overlay color
8.4.6) Overlay Opacity: You can set overlay opacity from here.
8.4.7) Overlay Top Padding: You can set overlay top padding from here
8.4.8) Name, Short Description and others: You can change font color, font size, font weight and Alignment.
Step 9: Carousel Slider Layout:
Select the “Carousel” from the layout dropdown then see its property come set that as you want

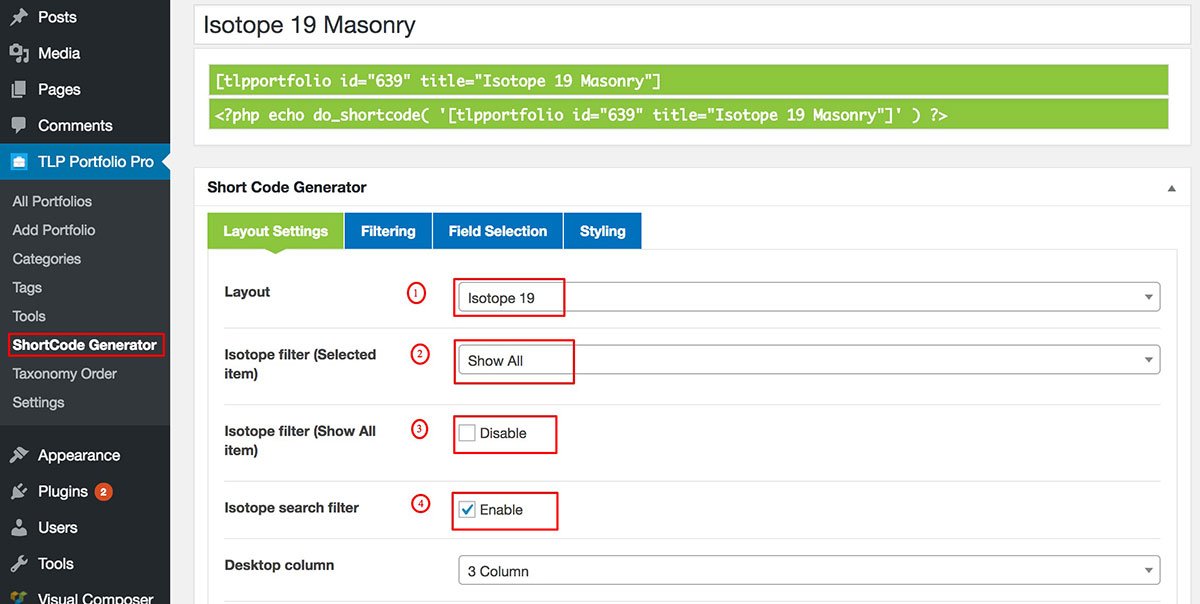
10) Set Isotope Layout:
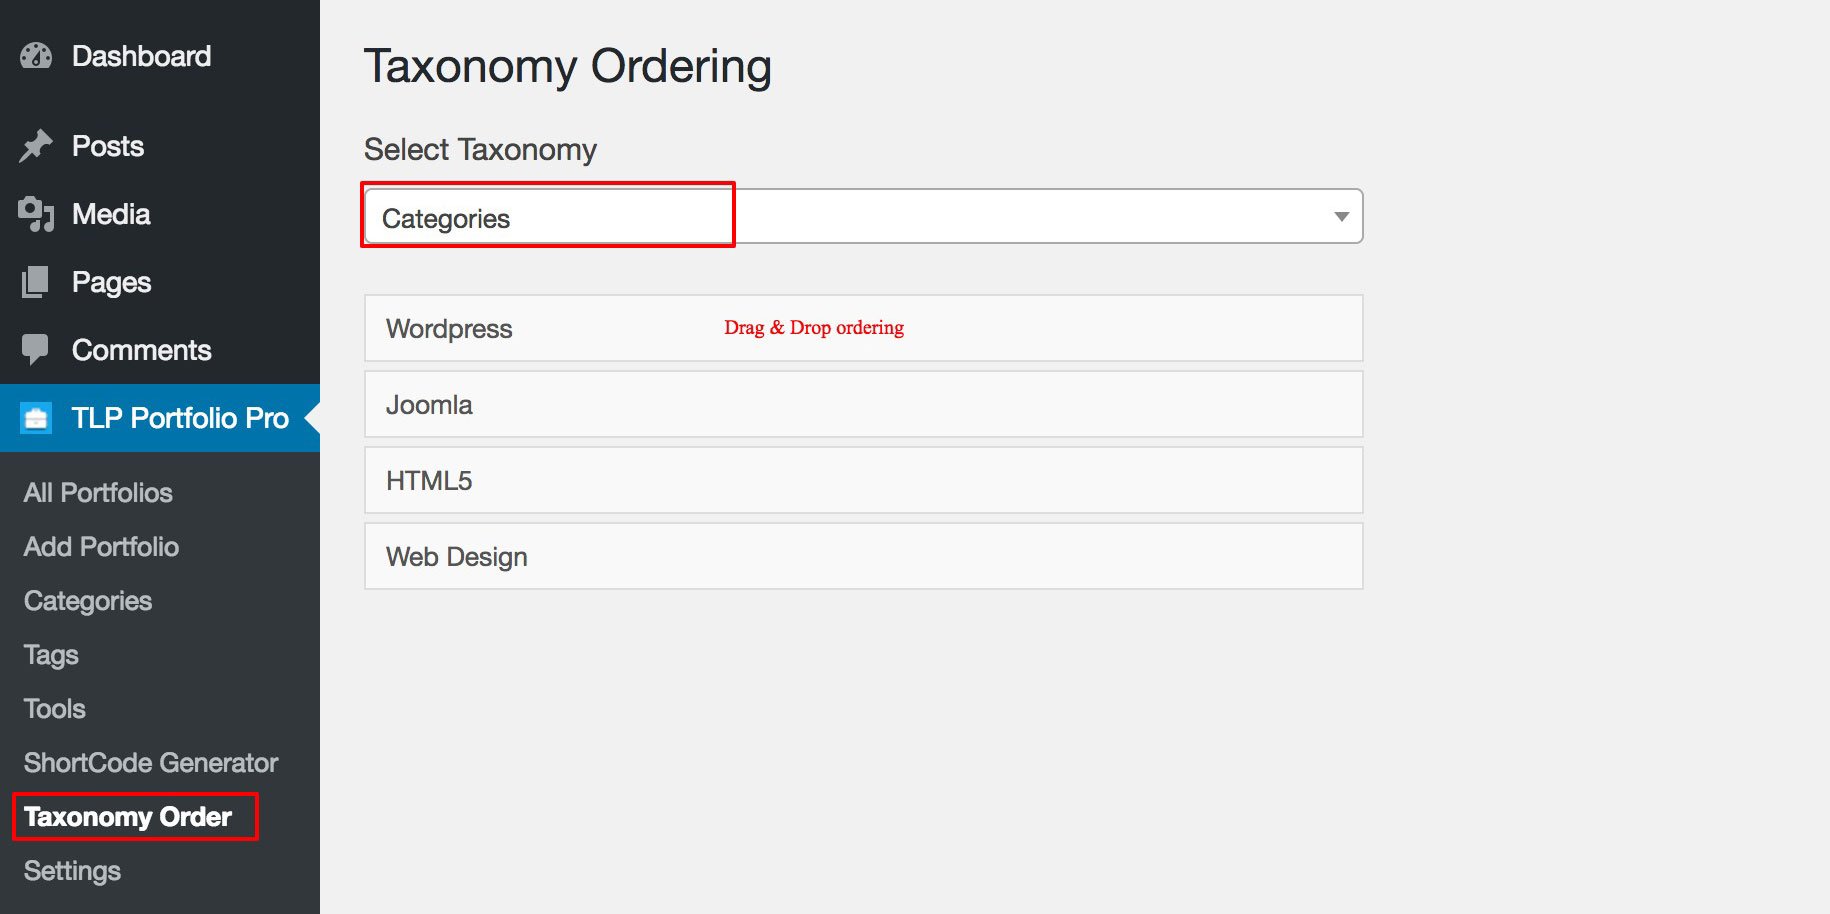
11) Taxonomy Ordering:
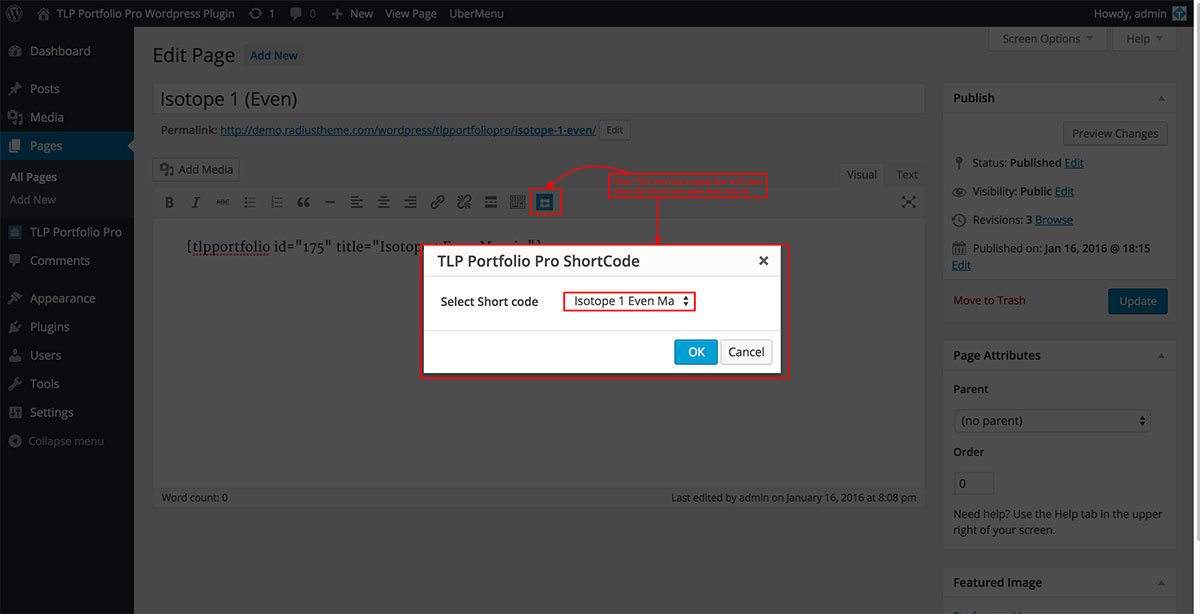
See the Visual Editor bar the “Portfolio icon” will show click on that icon then a popup box will show select the shortcode from the dropdown list then click ok.
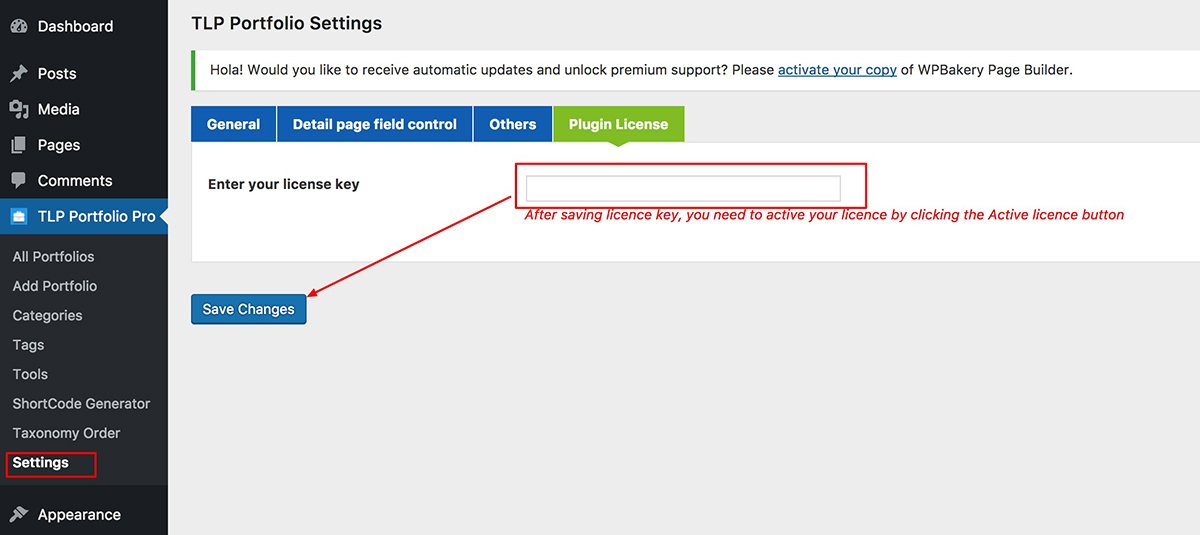
12) Active License
Go to Settings => Plugin License
Then enter your license key and click save after save refresh the page now Activate License Button will enable now click on the Activate License button.
Note: To Update from V 1.0 to V 2.0 No Data will lost but Shortcode need to Re-generate cause we did major improvement of Coding structor.