Step by step instructions how to setup and configuration Food Menu PRO for WordPress.
1. Download &Install
2. Settings
3. Add Category
4. Add Ingredient
5. Add Neutration
6. Add Unit
5. Add Tags
5. Add Food
5. Add Ingredition
5. Add Neutration
5. Enable Review
7. ShortCode Generator
8. Filtering
5. Fields
9. Styling
5. Add Isotope
13) Add Carousel Slider
10) Add into Page/Post
11) Add into Visual Composer
12) Activate License

Step 1: First download the TLP FoodMenu Pro from you purchase email download link or login from top menu then go to purchase history.
Install the plugin

Step 2: After active the plugin you will get a menu item like this.

3) Settings
3.1) Set your currency
3.2) Set currency Position
3.3) Decimal Seperator
3.4) Number of decimals

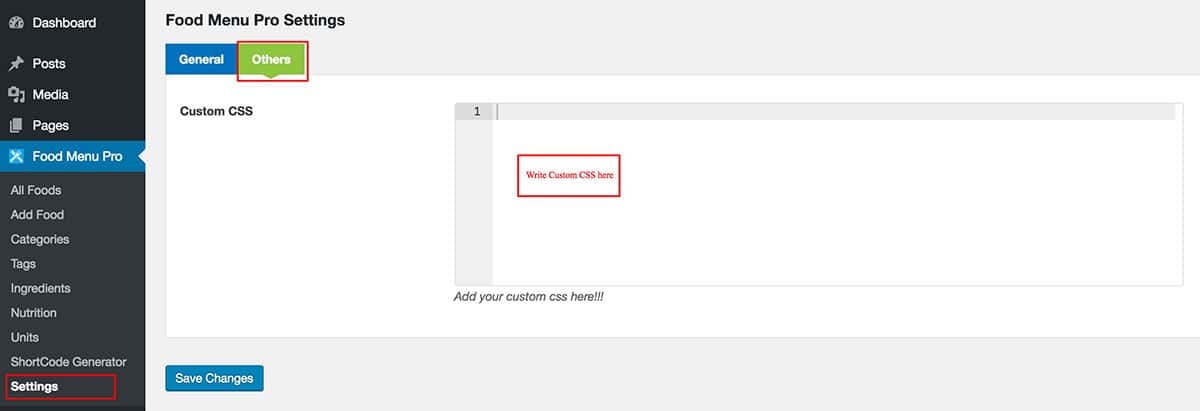
Custom CSS
Write your own custom css here
4) Add Category:
Enter Category name, Description, order and category image.

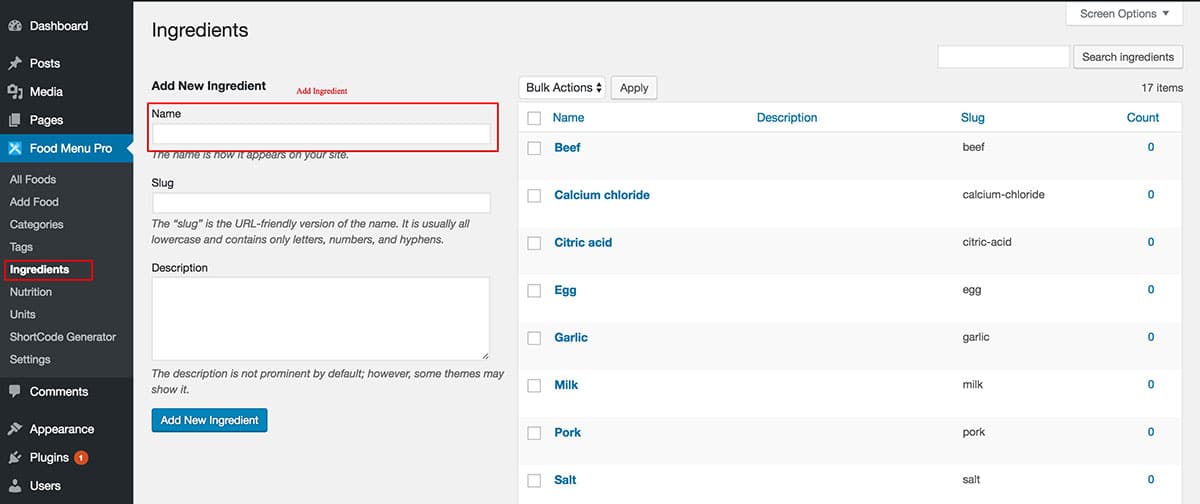
5) Add Ingredients:
Add New Ingriedient or Edit existing Ingriedient.
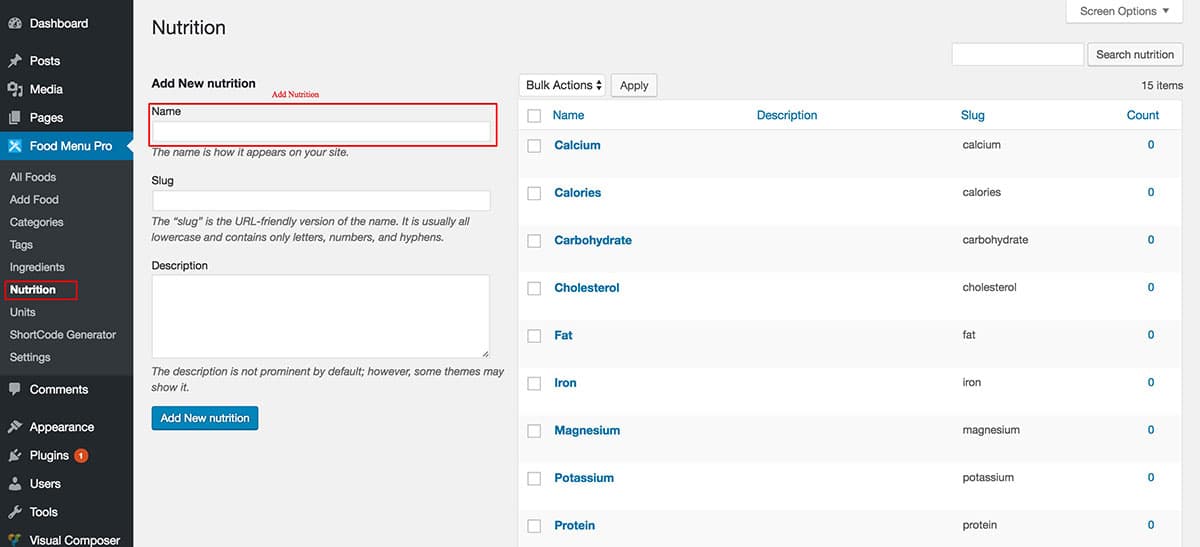
6) Add Neutritions:
Add New Neutrition or Edit existing Neutrition
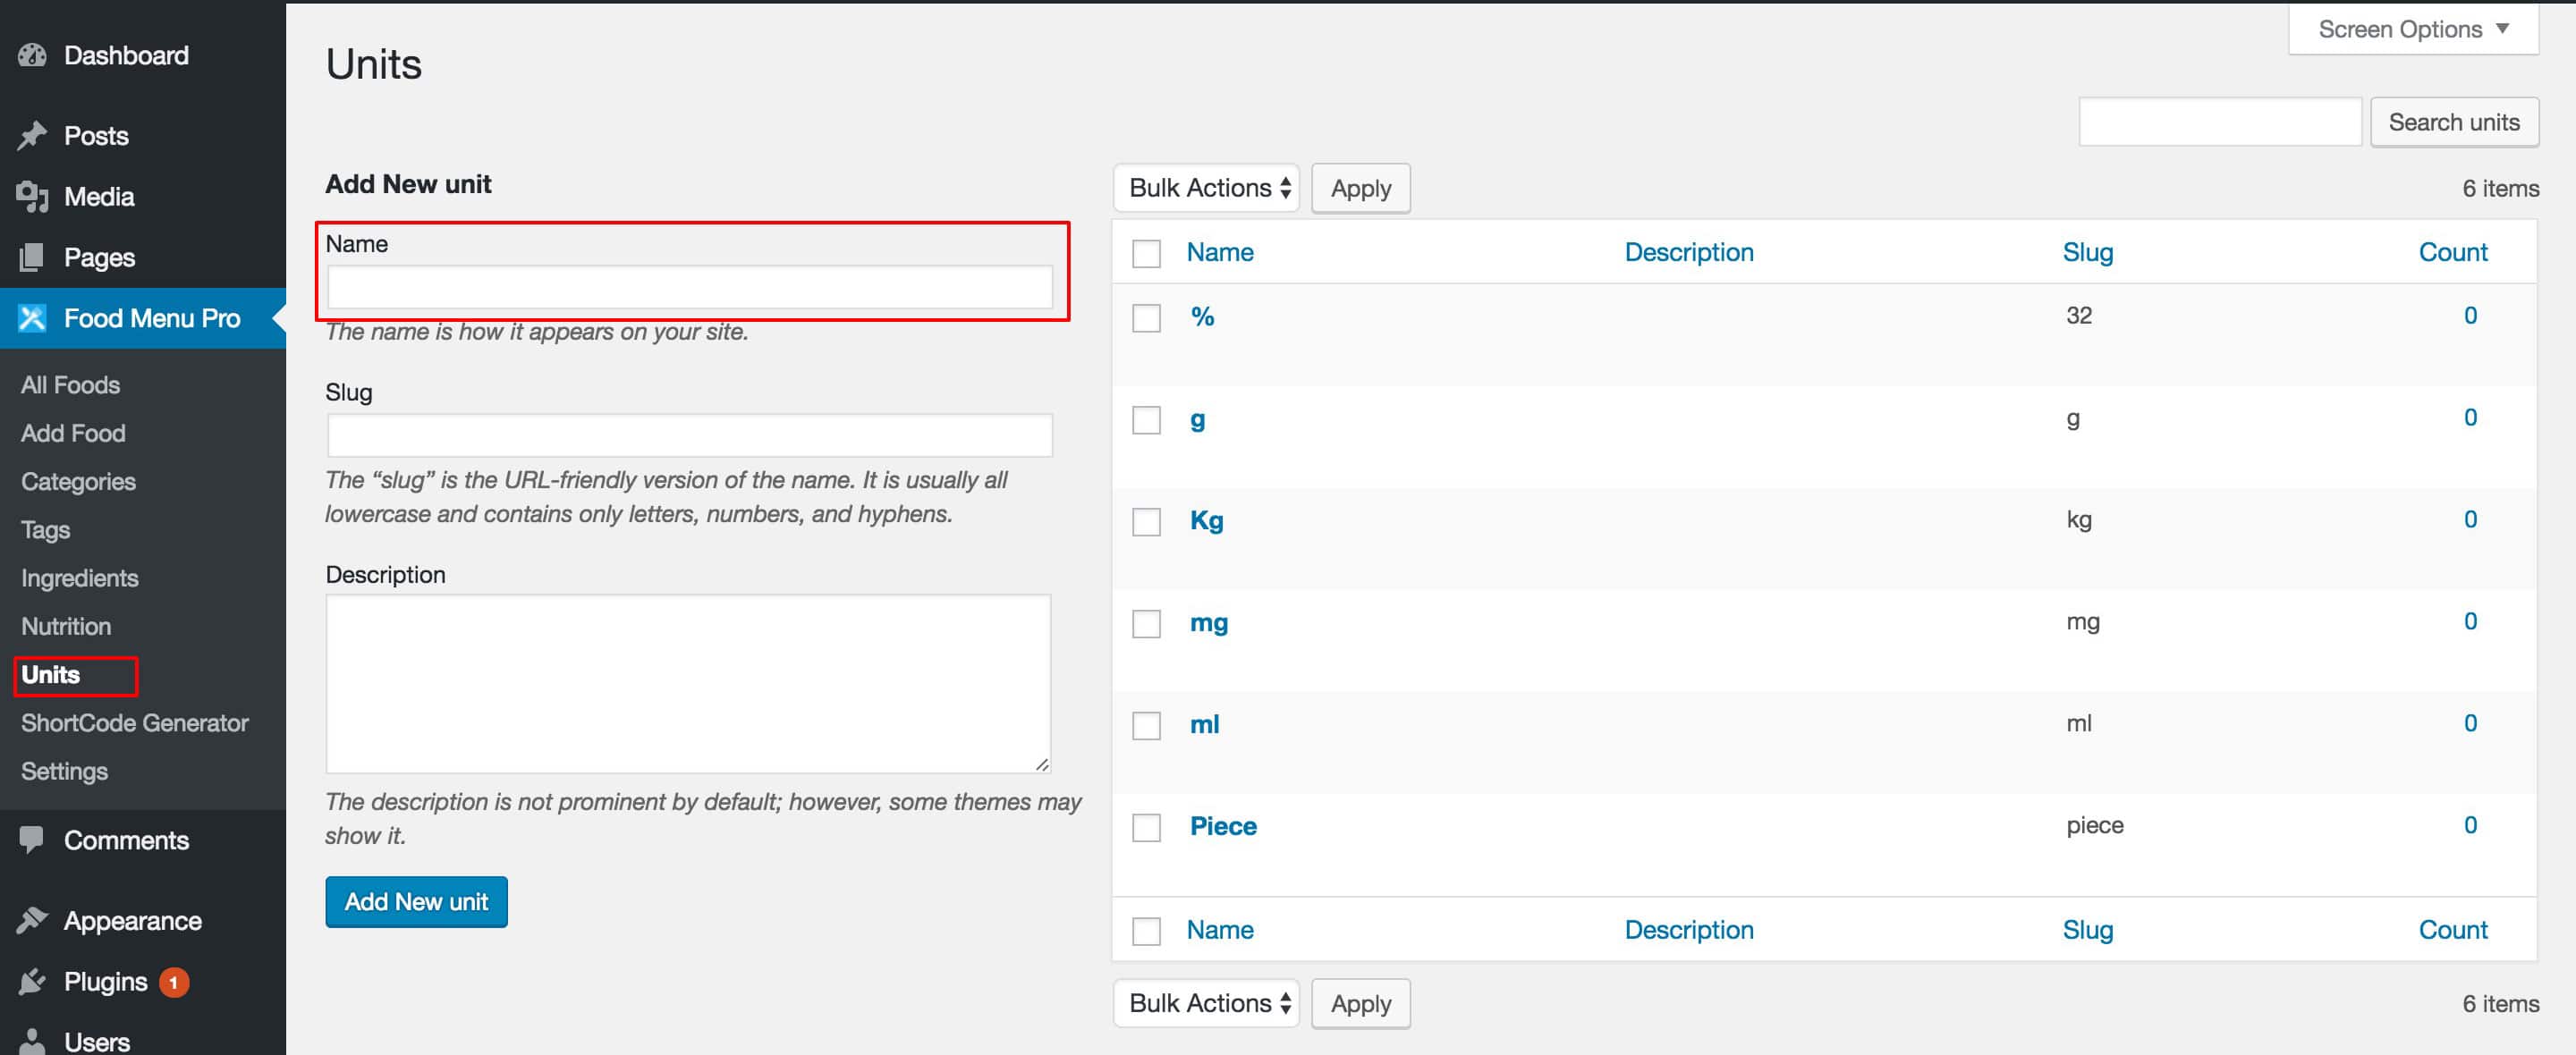
7) Add Unit
Add New or edit Existing unit
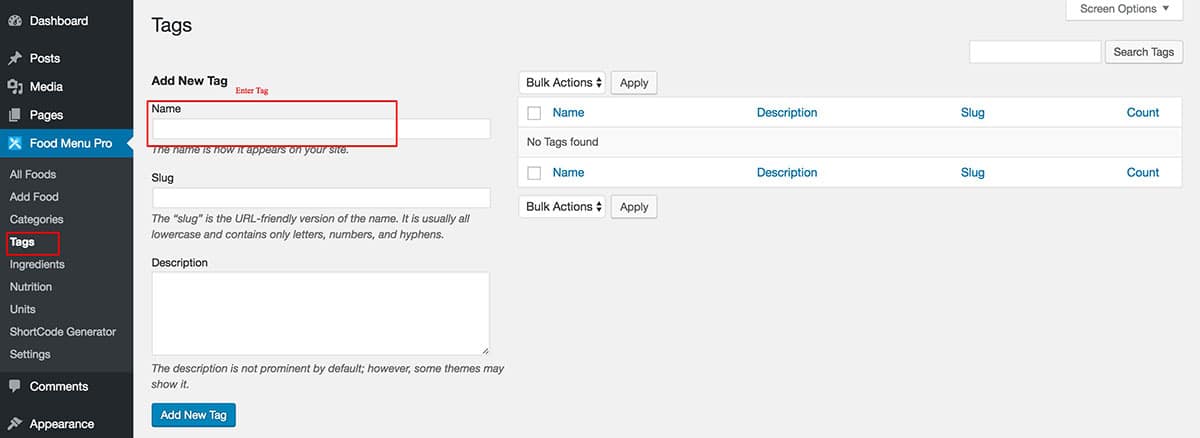
8) Add Tags:
Add New or Edit exisitng Tags
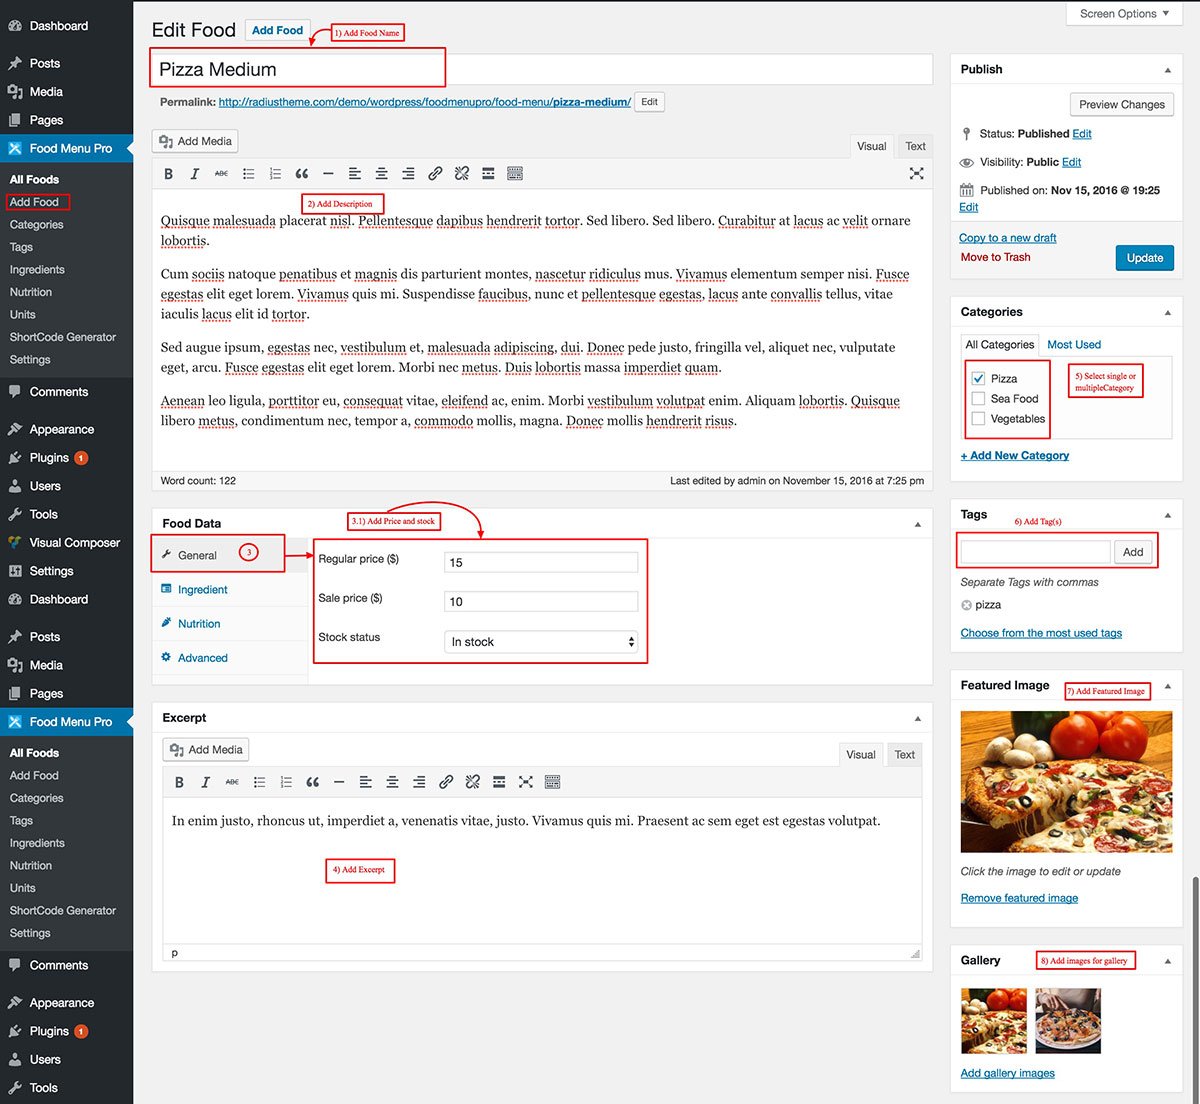
6) Add Food Menu Item:
In you want to add Ingridents and Neutritions then you need to add first then start to add Food Item
6.1) First field is Food Menu name.
6.2) Add Detail detail about the food it will show in detail page or popup page.
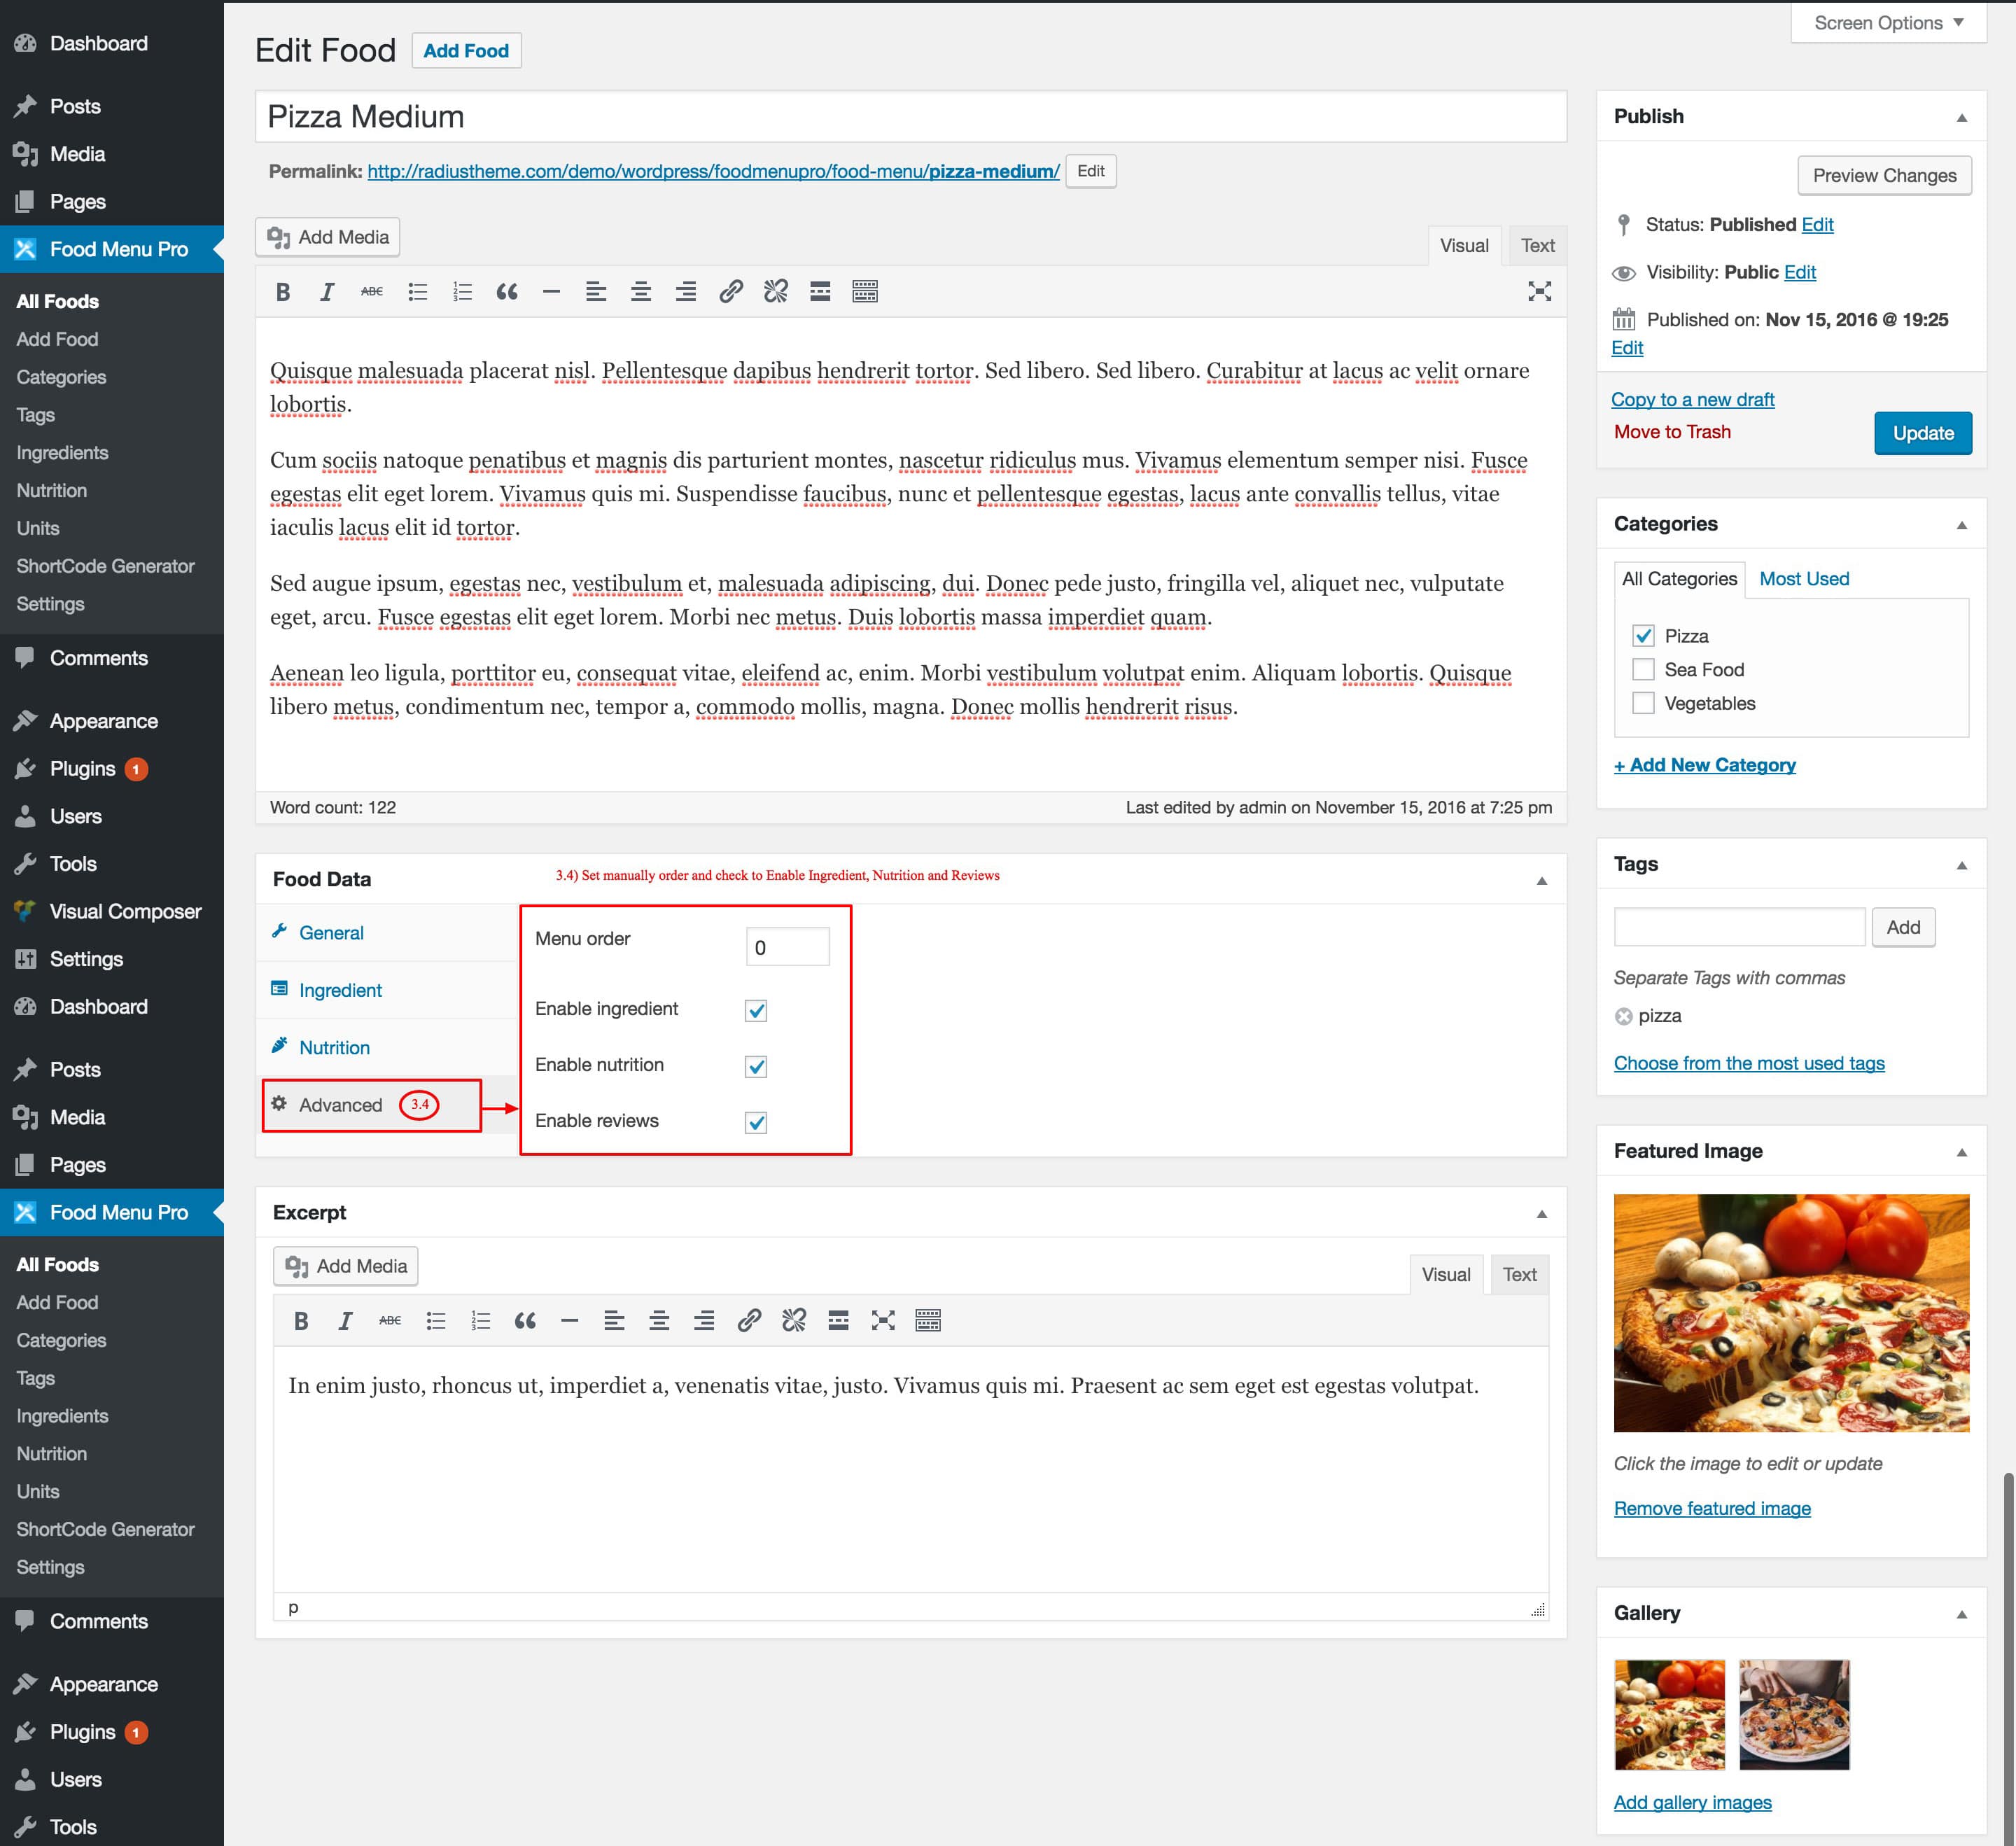
6.3) Food Data:
6.3.1) General: Add Regular Price if any discount then add Sale Price then set stock.
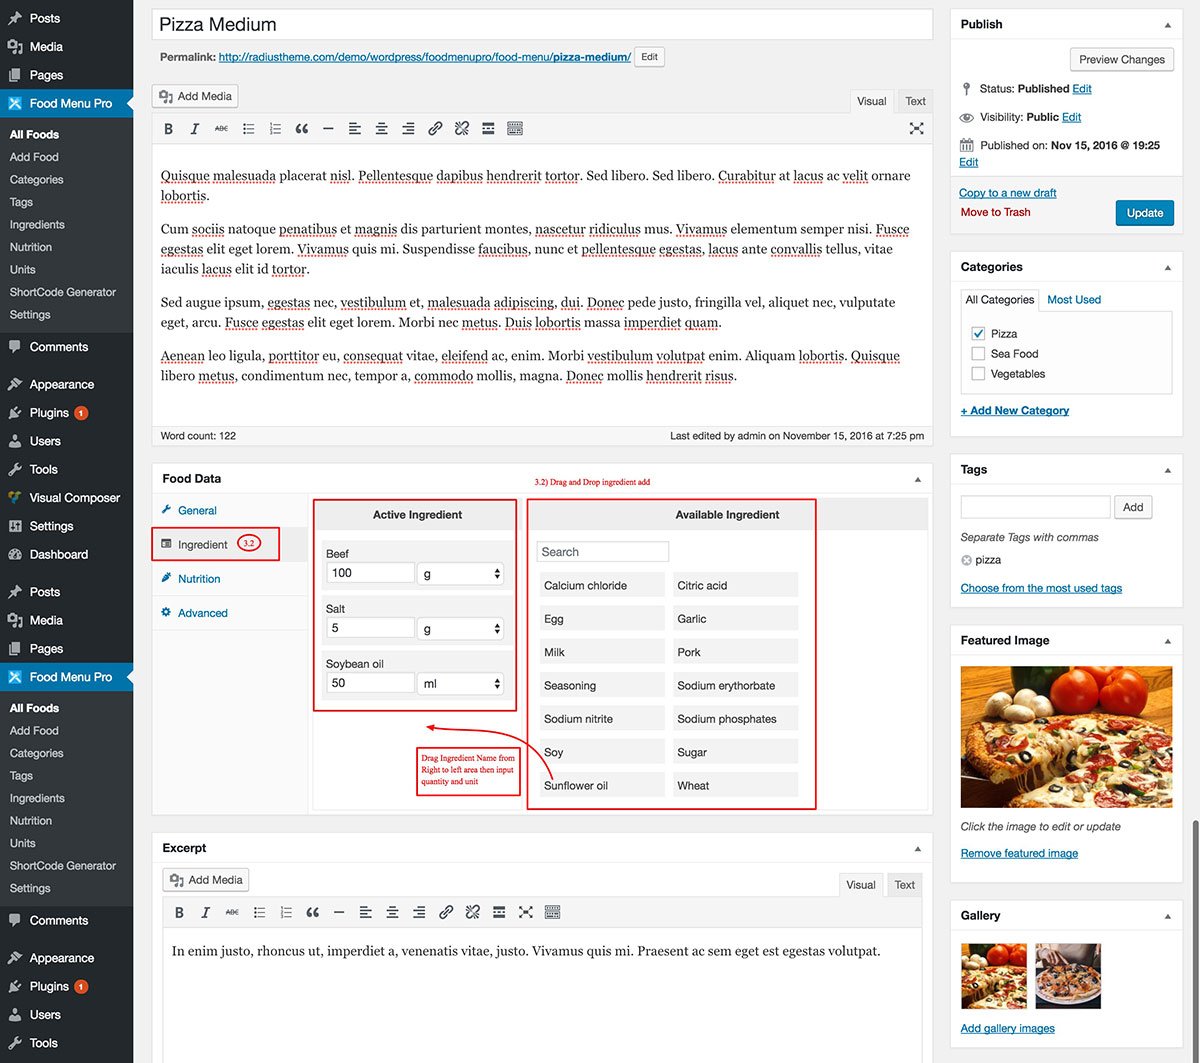
6.3.2) Ingredient: From available Ingredient list you can Drag & Drop to add. Just drag the name then set quantity and unit.
6.3.3) Neutritions: From availalbe Ingredient list you can Drag & Drop to add. Just drag the name then set quantity and unit.
6.3.4) Advanced: Set your custom order option also if check Enable Ingredient, Nutrition, Review then this information will show in detail and popup page.
6.4) Excerpt: Add different excerpt if you want different from description.
6.5) Select one or more Category.
6.6) Add Tags
6.7) Add main image of the food.
6.8) Add Additional images for gallery.
6.3.2) Set Ingredients:
6.3.3) Set Neutritions

6.3.4) Advanced TAB:
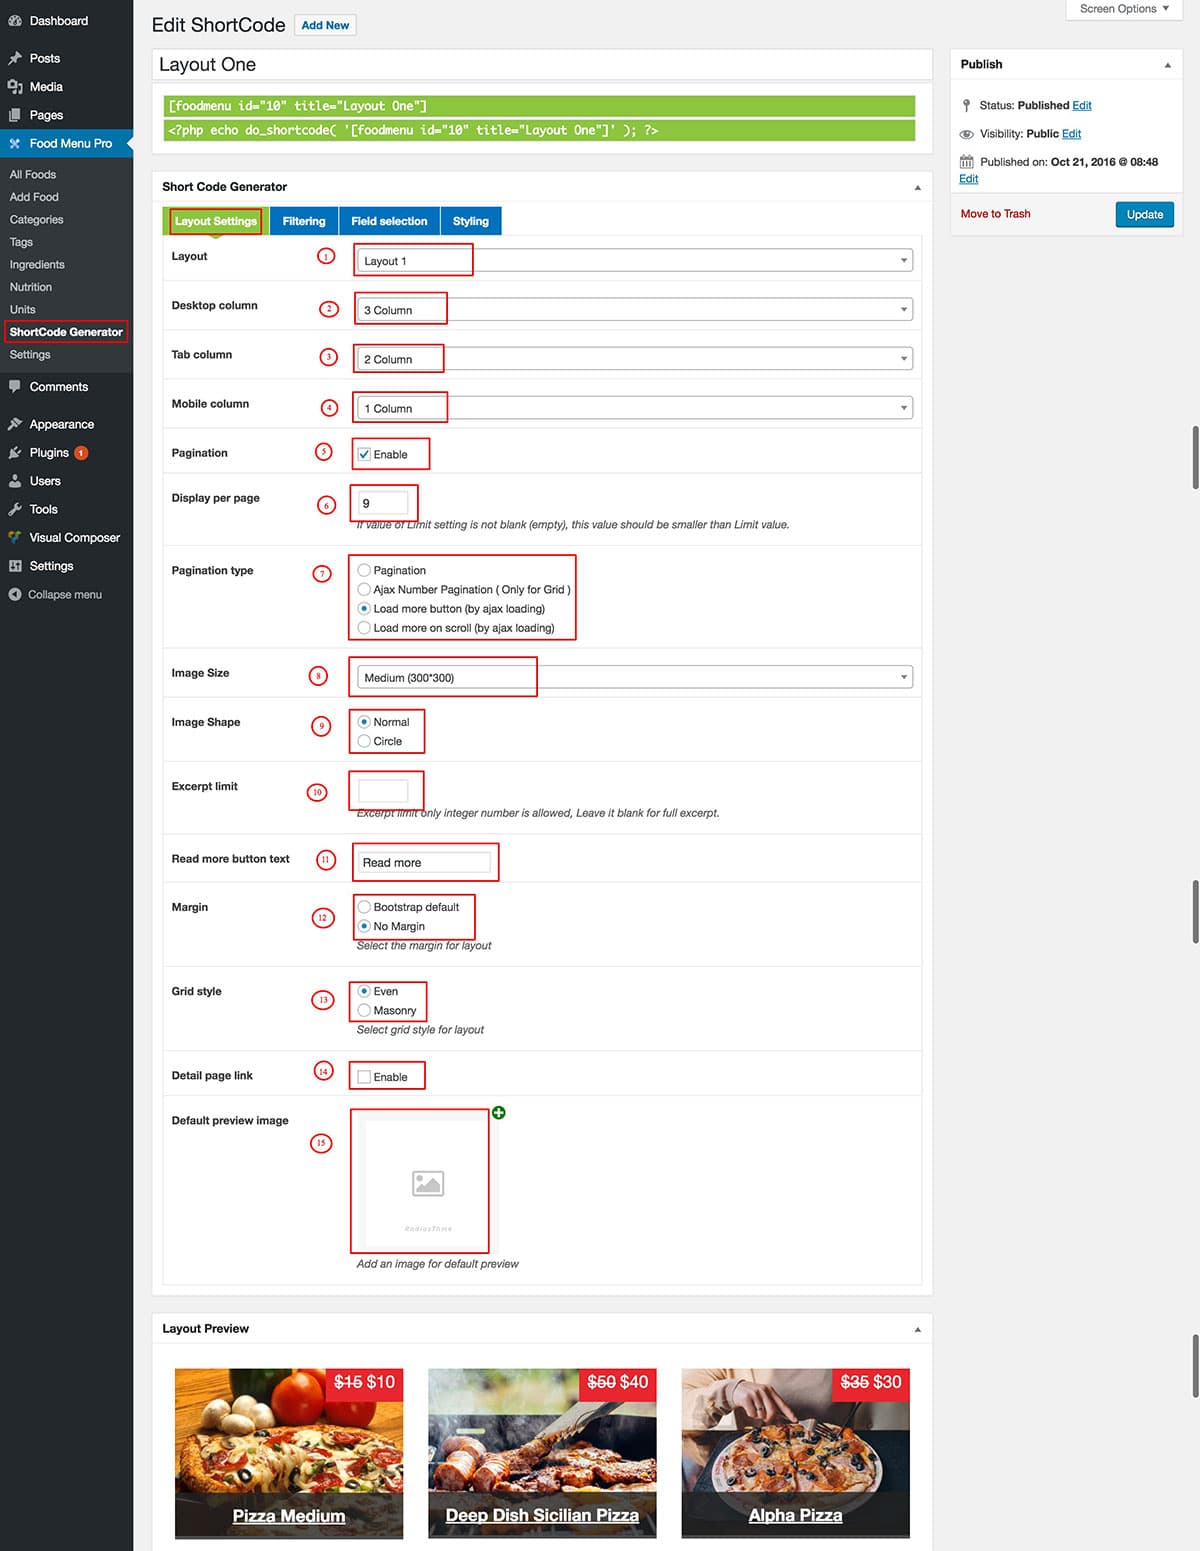
7) ShortCode Generator:
Give a title of the shortcode then see three tabs here General Settings, Field Selection then Styling
General Settings:
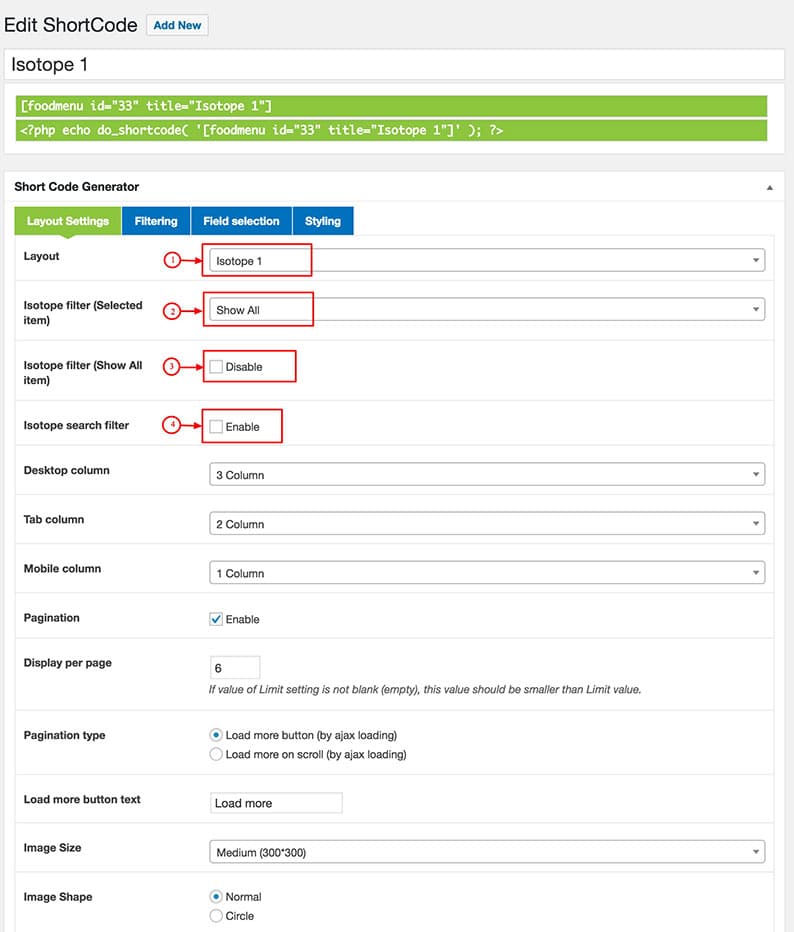
7.1.1) Layout: Select the Layout Grid View, Isotope & Carousel so select which one you want.
7.1.2) Desktop Column: You can select how many columns to show per row in Desktop View
7.1.3) Tab Column: You can select how many columns to show per row in Tab/iPad View
7.1.4) Mobile Column: You can select how many columns to show per row in Mobile Device View
7.1.5) Pagination: Check if you want to show pagination.
7.1.6) Display Per Page: Set how many want to show per page.
7.1.7) Pagination Type: There are 4 types of paginations Select which one you want.
7.1.8) Image Size: Select image size or set custom size.
7.1.9) Image Shape: Set Normal Square image or Rounded image.
7.1.10) Excerpt Limit: Set how many character you want to show.
7.1.11) Read More Button Text: Enter the text.
7.1.12: Margin: Set Bootstrap default 30 px margin or no margin.
7.1.13) Grid Style: Even or Masonary
7.1.14) Detail Page Link: Check to enable it then the next chck box for popup detail
7.1.15) Default image: You can set a default image if no featured image set then this image will display
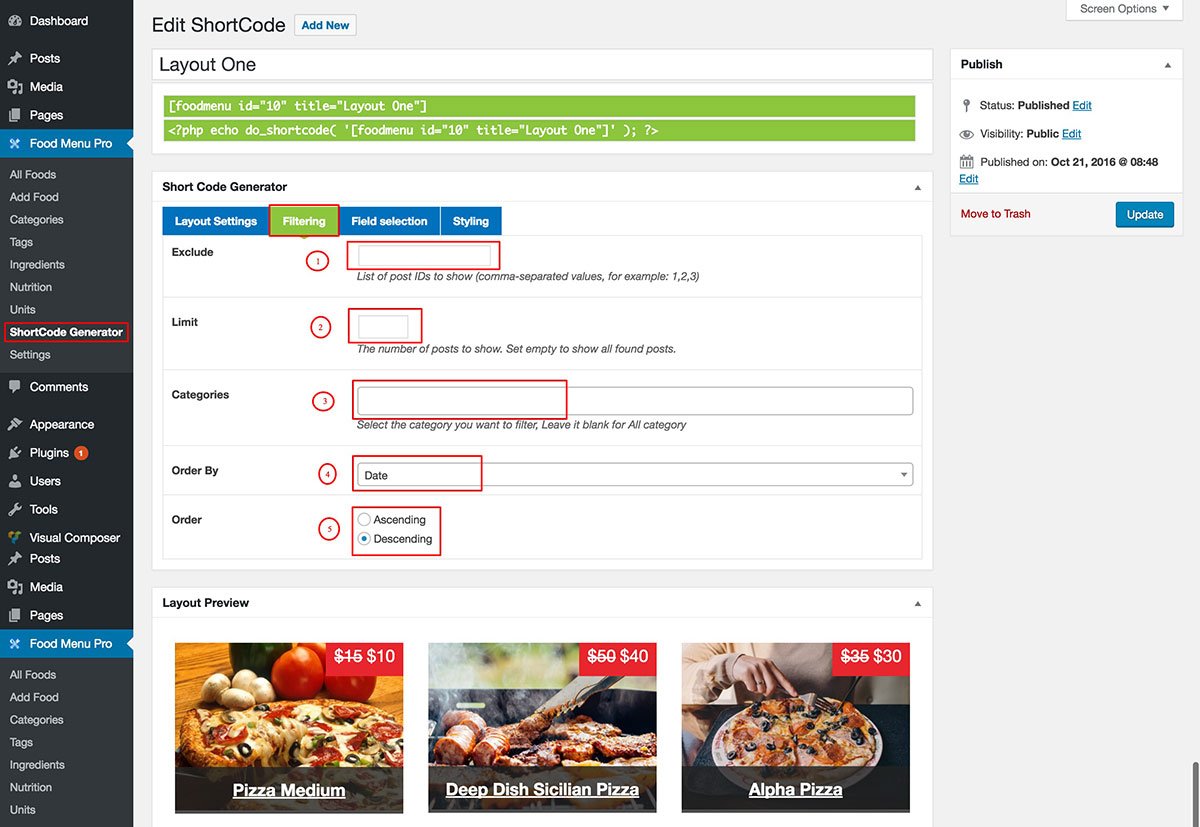
7.2) Filtering:
7.2.1) Exclude: You can exclude epecific food item by ID
7.2.2) Limit: You can set how many to display.
7.2.3) Categories: You can select specific category(s)
7.2.4) Order By: You can set order by Menu Order, Name, Date, Price and Random.
7.2.5) Order: Set Assending or Descending

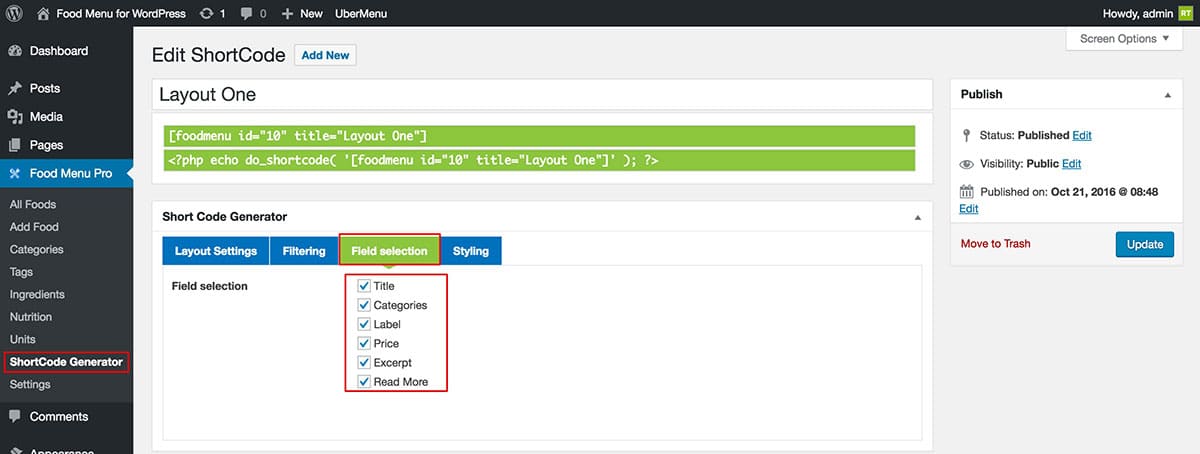
8) Field Selection:
You can select the fields which you want to display in list view page.
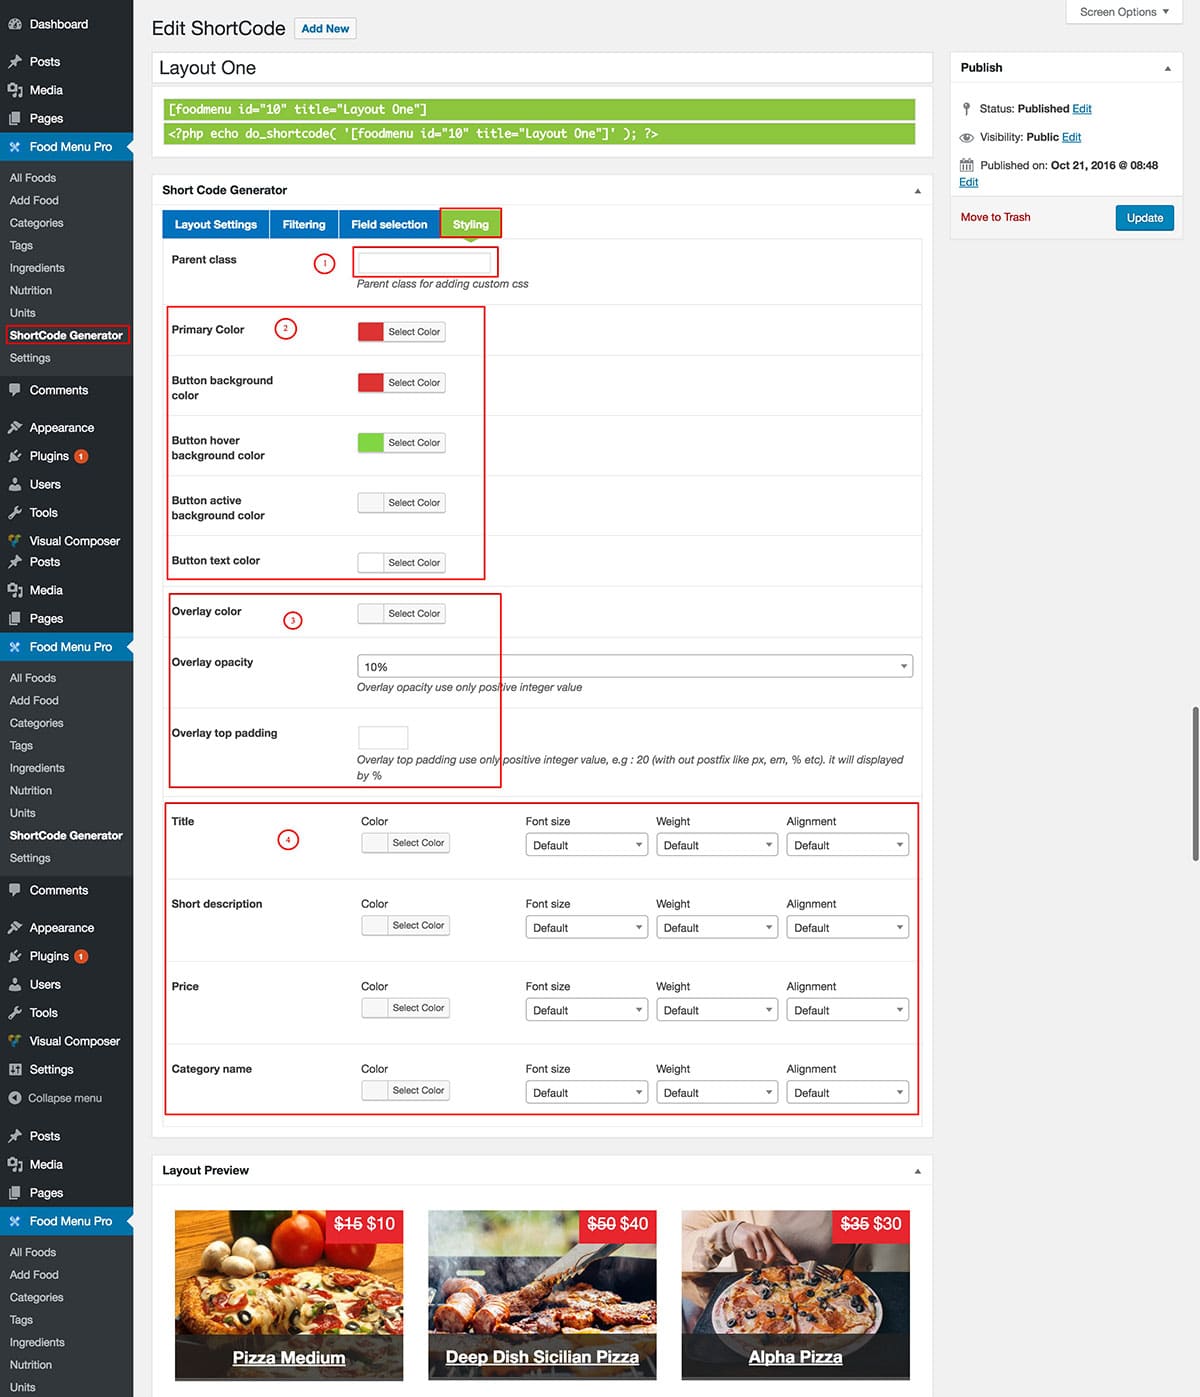
7.3) Styling:
All style Primary color, text size, text color and alignment you can set from here.
7.3.1) Parent class: You can set a specific class for your own styling.
9.1) Primary, Button background, Button hover, Button Active, Button Text Color: You can set Primary color as your theme color and button color and button text color.
9.3) Overlay Bg & Opacity & Overlay top Padding: You can set overlay background color and opacity and top Padding
9.4) Title, Short Description, Price and Category name: You can set color, font size, font weight and alignment.
12) How to select Isotope Settings
First check box the specific member then in right a selection option will come from here you can select one or more member just select member name
13) Add Carousel Slider:
From shortcode generator first select the carousel layout then see bottom the carousel settings will come check which options you want.

Carousel Look

How to Enable Ingredient, Nutirition and Review
10) Add into Page/ Post:
From Visual Editor see Food Menu PRO icon click on this icon then a popup open with the shortcode you generated in (7) seelct the shortcode then click ok this will insert a shortcode into your page/post.

Then save the page/post and go to front end you will get the Food Menu.
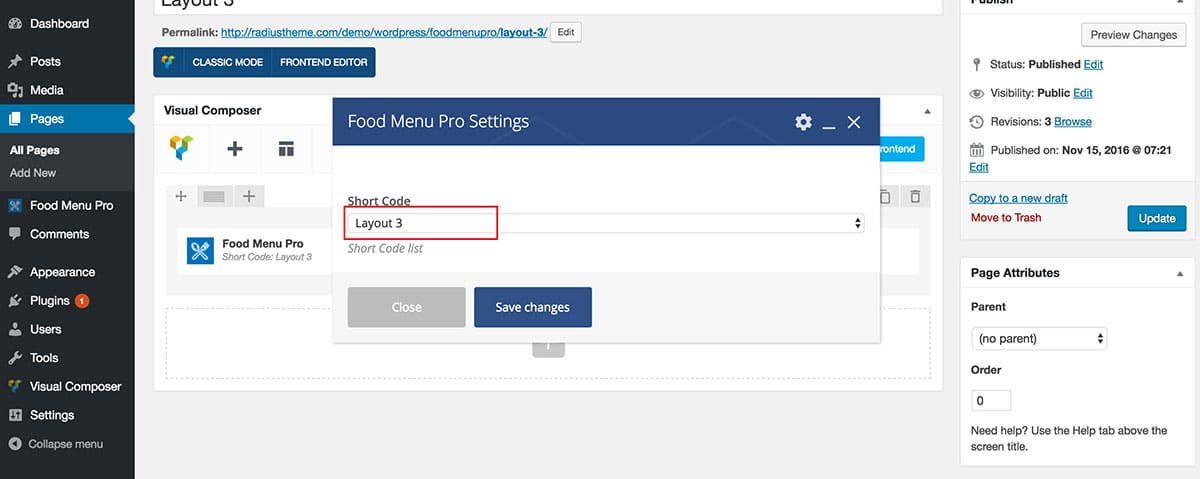
11) How to add into Visual Composer:
From the Visual Composer Element Select Food Menu PRO then you will get short code Selection option see next screenshot.

Select Short code
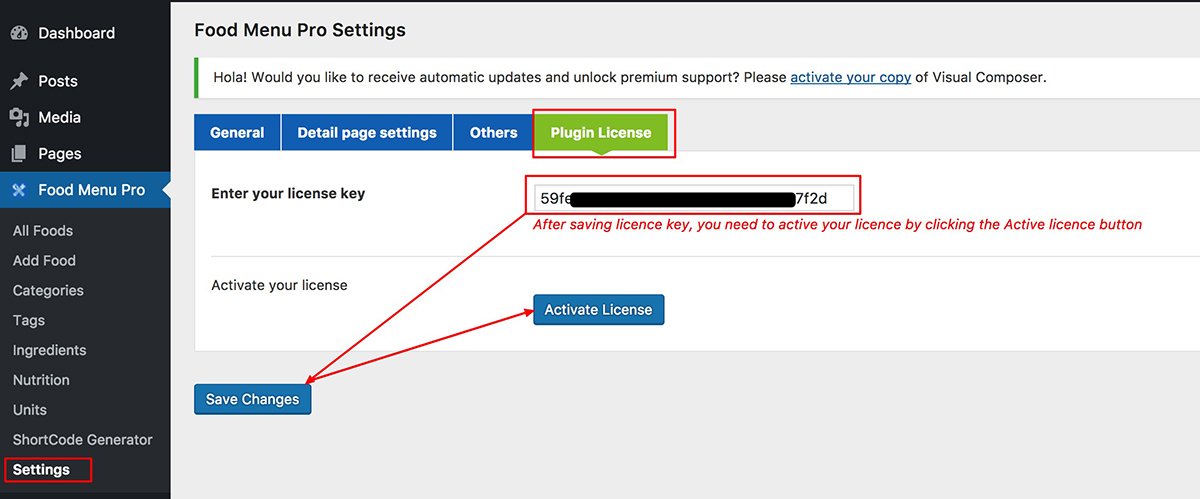
12) Active License
Go to Setting=> Plugin License
Then enter your license key and click save after save refresh the page now Activate License button will enable now click “Activate License” button to active your license key.